Table of Contents
Wondering how to properly clean your makeup sponges? Keeping your makeup applicators clean is so important for healthy skin and preventing breakouts. In this guide, we’re going to go over everything you need to know about cleaning all types of makeup sponges and beauty blenders.
Introduction How To Clean Makeup Sponges
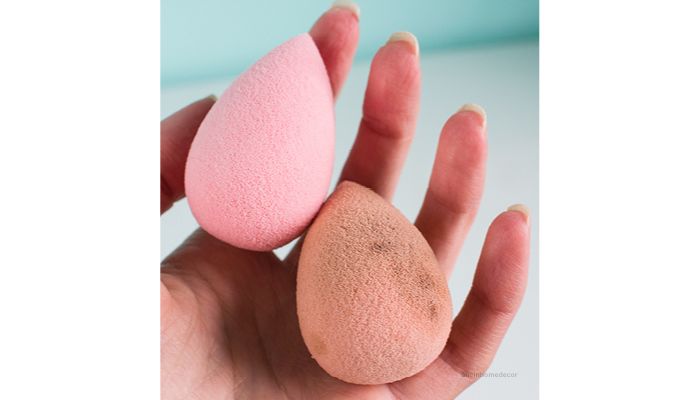
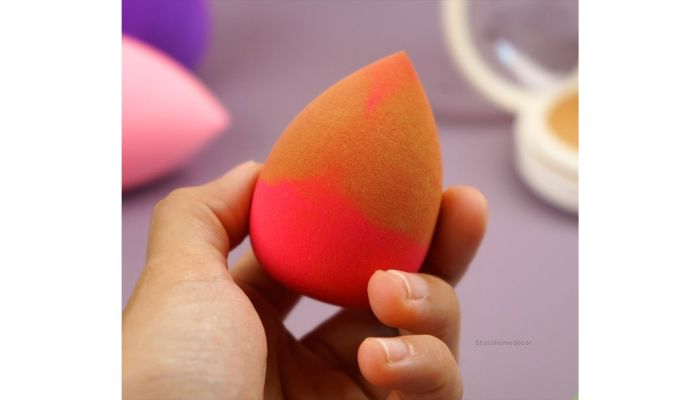
If you use sponge-type makeup applicators like beauty blenders, then you know how quickly they can collect dirt, oil, makeup residue and bacteria. Not cleaning them is a one-way ticket to clogged pores, breakouts and skin irritation.
Luckily, it only takes a few minutes to thoroughly clean makeup sponges and keep them in tip-top shape. We’ll cover how often you need to clean them, the best cleaning methods and products, how to thoroughly dry them, storage guidelines and ways to extend the life of your sponges.
So whether you use a classic wedge sponge, a makeup blender like Beauty Blender or Real Techniques Miracle Complexion Sponge or something else – this article is for you! Read on to learn everything you need to become a pro at cleaning makeup sponges.
Why Should You How To Clean Makeup Sponges?
Do you really need to regularly clean your makeup sponges or can you let it slide once in a while? Well, here are some important reasons why you absolutely should make sponge cleaning a priority:
- Prevent Skin Irritation and Acne
Dirty makeup sponges harbor all kinds of bacteria, which gets transferred onto your face during use. This causes redness, inflammation, breakouts and clogged pores – it’s just bad news if skincare is a priority for you. - Stop Oil Buildup
After multiple uses, makeup sponges collect excess oil from your face and makeup. Pressing a greasy, fatty sponge into your skin leaves a gross film over time. - Improve Blending
Have you noticed your makeup blending results aren’t as flawless recently? Well, dirty sponges don’t blend liquid or cream products as well as clean ones – the oils clog up the applicator’s surface.
You’ll get much better makeup application from a clean, conditioned sponge!
How Often Should You How To Clean Makeup Sponges?
Most beauty websites recommend cleaning your makeup sponges every 1-2 weeks. However, here are some general guidelines based on your usage frequency:
Every day use
Clean every 5-7 days
A few times a week
Clean every 10-14 days
Once a week or less
Can go 2-3 weeks between cleaning
Always clean sponges immediately if you see stains or buildup. And if you’re using sponges on more than one person, sanitize between uses to prevent bacteria spreading.
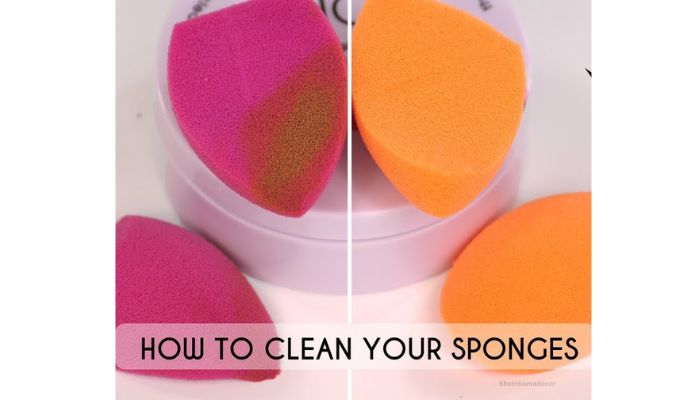
The Best Way How To Clean Makeup Sponges
There is no shortage of makeup sponge and blender cleaning products you can buy. However, the most cost-effective way is to simply use gentle cleansers you already own.
Here is a simple, foolproof method to safely clean and condition your makeup sponges:
Supplies Needed
- Mild makeup remover, liquid soap or gentle facial cleanser
- Old, clean toothbrush
- Bowl or sink
- Paper towels or clean hand towel
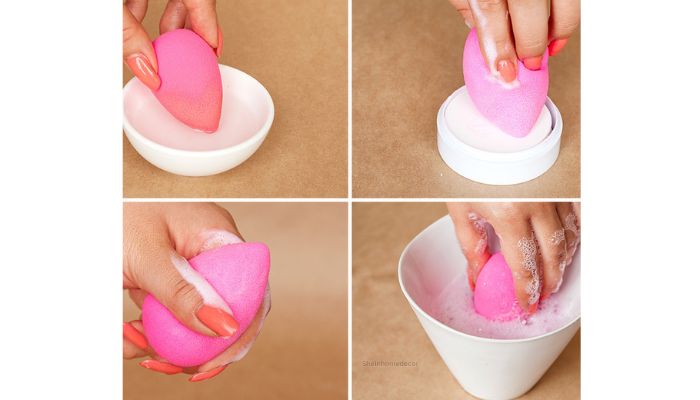
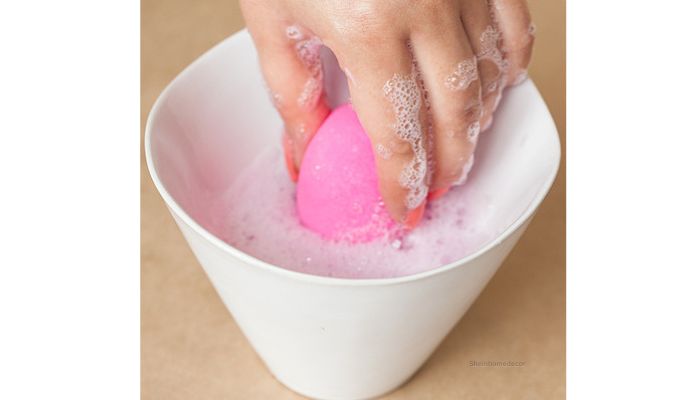
Step 1 – Wet Your Sponge
Run your sponge under warm water and gently squeeze until fully saturated. You need water first to dissolve the heavier makeup gunk inside.
Step 2 – Add Cleanser
Put a bit of your makeup remover, gentle soap or cleanser onto the sponge and lather it up nicely. Avoid rubbing too hard yet – just get everything fully covered in cleanser.
Step 3 – Brush the Sponge
Here comes the most important step that removes the deepest stains! Take that old toothbrush and gently brush all sides of the sponge, concentrating on the areas with the most makeup stains.
Optional – if it’s too labor-intensive to brush the whole sponge, just focus on the very stained areas for 1-2 minutes max.
Step 4 – Rinse
Rinse the sponge under warm running water until all the soap/cleanser residue has disappeared. Be persistent and patient here, you want ALL traces of makeup and cleanser out.
Step 5 – Condition (Optional)
Some people suggest massaging a tiny amount of inexpensive hair conditioner into clean sponges to revive them. Then rinse it all out.
This can make sponges super soft and flexible again! But it’s not a necessary step if you don’t have conditioner.
Step 6 – Squeeze out Excess Water
Gently press or squeeze the waterlogged sponge against a towel to soak up excess moisture. You don’t want pools of water diluting the cleanser next time.
Step 7 – Allow to Completely Air Dry
Lay your sponge on a clean towel in a well-ventilated area. Change the towel if the sponge drips a lot at first.
Do NOT speed up drying with hair dryers or direct heat! This can warp the shape and material.
Be patient – the average beauty blender takes 6-12 hours to fully dry. Larger sponges can take 24 hours or more if the climate is humid.
Step 8 – Store Properly Once Dry
We’ll go over makeup sponge storage best practices in more detail later. But in general, keep them in a clean, enclosed container until next use to prevent picking up new grime or germs.
Now that you know how to thoroughly The Best Way How To Clean Makeup Sponges, let’s go over some other questions.
Can You Wash Beauty blenders in The Washing Machine?
Some people wonder if it’s safe to wash Beautyblenders (the pink makeup sponges) or their cheaper drugstore lookalikes in the washing machine along with regular clothes and towels.
The short answer – no! Washing machine detergents and high heat levels are too harsh for most makeup sponges. The jostling and friction against other items can also easily warp or tear them.
Only certain very durable wedge sponges are specifically designed to survive the washing machine cycle. So definitely hand-wash all other delicate makeup sponges according the method above!
What Household Items The Best Way How To Clean Makeup Sponges?
If you don’t have special brush cleansers or sponge soaps, no need to stress or make a special store trip. Chances are you already have effective items for cleaning beauty blenders sitting in your home right now!
Here are common household cleansers that safely remove makeup buildup and residue from sponges:
- Baby shampoo or gentle liquid hand soap
- Micellar water (great built-in makeup remover)
- Diluted apple cider vinegar or witch hazel (disinfecting)
- Face cleanser or makeup remover (avoid harsh acne formulas)
- Dish soap (dilute first and avoid getting in eyes)
- Baking soda paste (gentle abrasive exfoliant)
- Hydrogen peroxide (disinfects and whitens)
Avoid anything too thick or gritty that could compromise the delicate sponge material. And steer clear of activated charcoal cleansers around lighter colored sponges – they can stain the applicator grey over time.
What is The Best Product to Clean Makeup Brushes and Sponges?
Ok, ok – we know some of you simply MUST buy a special brush and sponge cleanser product instead of DIYing something. No worries, we definitely recommend keeping a deep cleaning brush shampoo on hand for serious stain dissolving power!
Here are our top picks for makeup brush and sponge cleansers:
Best Budget Sponge Cleaner – Eco-tools Makeup Brush Cleansing Shampoo, $5
Deep cleans without fragrances or harsh ingredients
Best Selling Brush Cleaner – Beauty Blender Solid Pro Cleanser, $16
Cult favorite, comes with textured silicone pad
Best Multi-Tasking Option – Cinema Secrets Makeup Brush Cleaner, $18
Effective on brushes, sponges, wigs, appliances
Luxury Pick – Sephora Collection Daily Brush Cleaner, $16
Highly rated gel, keeps brushes in great condition
Best Natural Formula – The Brush Egg Cleansing System, $15
No chemical residue, reusable egg-shaped pad
How to Dry Beauty Blenders Faster
We mentioned earlier that letting your sponges air dry is the safest method. However, we know the average 10+ hour drying time isn’t always realistic!
Here are some tips to reduce waterlogged sponge drying time just a bit:
- Gently squeeze out excess moisture with a clean towel before laying flat to dry
- Place near (not directly IN) sunlight or nearby a vent or AC unit
- Use a blow dryer on COOL setting only; never hot temperatures!
- Buy a specialty quick-dry “drying egg” terrycloth caddy
Does Microwaving Kill Bacteria on Makeup Sponges?
What about “sanitising” damp beauty blenders in the microwave to kill germs before use? Terrible idea!!
First of all, microwaving does NOT fully sanitize makeup sponges, no matter what dangerous DIY tutorials may claim. Household microwaves do not reach temperatures high enough to kill all bacteria, viruses and mold.
What microwaving sponges will do instead:
- Leach dangerous plastic chemicals if applicator contains synthetic latex or foam
- Create a scorching hot center that can severely burn your skin upon application
- Deform the sponge shape once the material starts melting
- Destroy the look and blending ability of the applicator
It’s just too risky and provides no practical bacteria-killing benefits! Stick to thoroughly washing with soap and water, air drying completely, and storing properly between uses.
Can You Use Rubbing Alcohol to Disinfect Beauty blenders?
Speaking of disinfecting sponges, some people soak or spot clean theirs with ISO propyl rubbing alcohol instead of using a facial cleanser.
In theory this should kill germs – but sadly alcohol is not safe for actual makeup application afterwards!
Here’s why:
- Alcohol completely strips healthy oils and moisture from the sponge material. This leaves them brittle and dried out, diminishing the blending quality.
- Any lingering alcohol residue left inside can severely irritate and damage facial skin during makeup application. No bueno!
- The alcohol smell and drying effect also persists no matter how much you rinse or dry the sponge.
We recommend gently washing makeup sponges with a non-stripping cleanser formula instead. Or as a possible alternative – try spot cleaning stained areas with very diluted hydrogen peroxide.
Just be sure to thoroughly rinse sponges afterwards! The peroxide breaks down into harmless water quite quickly as it dries.
How to Store Beauty Blenders and Makeup Sponges Practicing good beauty blender storage habits helps keep them clean between washes, preserves quality and extends their usable lifespan. Here are our top storage dos and don’ts:
DO store completely dry sponges sealed in a breathable container. Clean plastic cases or mesh bags work great. This keeps away dust and other contaminants when not in use.

DO stand sponges upright on their base if possible – don’t stack flat or crush them. Gravity helps evenly distribute left over moisture while drying upright.
DON’T fully seal still slightly damp sponges – trapped moisture breeds mold and bacteria. Always confirm 100% dryness before tightly sealing. Consider using dessicant packs for humid climates.
DON’T store used sponges touching other makeup products in kits or bins. This allows oils and pigments to cross-contaminate everything else.
DON’T loosely toss beauty blenders back into a makeup drawer either. Pick a dedicated storage place away from dusty loose powders and liners to avoid stains.
How Long Do Beautyblenders® Last? When To Replace Them? The average reusable makeup sponge lasts around 3-6 months with proper care and cleaning. But there are a few clear signs it’s time to finally replace a well-loved beauty blender or other applicator:
- Change in texture. If smooth fine tip becomes rough, torn or misshapen. Difficult to work product into.
- Consistent staining or discoloration that won’t wash out after multiple cleanings
- Unpleasant odor emerges even after washing
- Dries out too quickly and absorbs less makeup product
- Becomes too stiff and difficult to squeeze, loses bounce back
- You used it on someone else for sanitary reasons
As tempting as it is, don’t wait until a sponge fully falls apart before replacing it! Gradual wear impairs blending ability long before they visibly disintegrate. Invest in multiples so you always have a fresh one prepped and ready to go.
DIY Homemade Beauty Blender Sponge Alternatives Fed up with the short life of expensive store bought makeup sponges? Consider trying one of these homemade blender beauty DIY alternatives you can make from household items:
- Latex sponge wedge cut from larger mat sink scrubber
- Egg cell kitchen sponges cut into smaller pieces
- Smooth microfiber cloth folded into applicator shape
- Dense polyurethane foam craft sheet cut into teardrop or wedge
- Makeup remover cotton pads pressed together into desired shape
While homemade sponges likely won’t mimic the exact softness and performance of specialty cosmetic sponges, they provide a nice cheap trial option while you practice technique.
Just remember to still clean and condition these DIY beauty blenders regularly for best possible makeup application!

In Conclusion How To Clean Makeup Sponges
By now you have all the core basics down for keeping makeup sponges clean, conditioned and ready to help you achieve flawless complexion results:
- Wash every 1-2 weeks with gentle cleanser and an old toothbrush
- Squeeze out excess moisture and let air dry completely before storing
- Keep inside clean, breathable containers between uses
- Avoid heat tools that can damage shape and material
- Replace consistently stained or falling apart sponges
- Experiment with DIY homemade blender beauty options!
Here’s to happy healthy skin and perfect makeup application with sparkling How To Clean Makeup Sponges! We hope these cleaning and care tips help take your beauty routine to the next level.