Table of Contents
Introduction of Electric Pressure Cooker Canning
Home canning allows you to enjoy delicious homemade foods long after harvest seasons have passed. While traditional water bath and stovetop pressure canning methods have been relied on for generations, electric pressure cookers now offer a more modern approach.
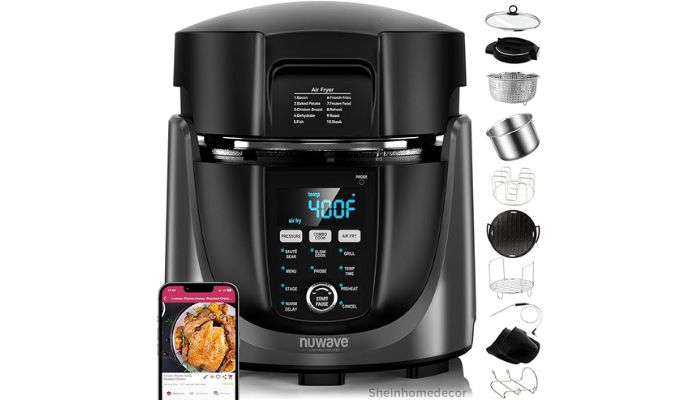
Electric models like the Instant Pot provide push-button functionality to safely can fruits, vegetables, meats, seafood, stocks and more with minimal effort. They precisely regulate temperature and pressure for hands-off preserving.
In this comprehensive guide, we’ll explain how Electric Pressure Cooker Canning Work for canning and provide detailed instructions for both novice and experienced home caners. Let’s dive into maximising these versatile electric appliances for all your food preservation needs!
Benefits of Electric Pressure Cookers Canning
Electric Pressure Cooker Canning offer significant advantages over stove-top canning:
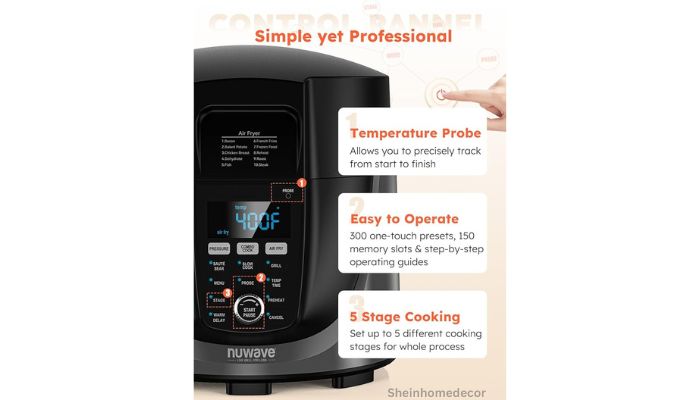
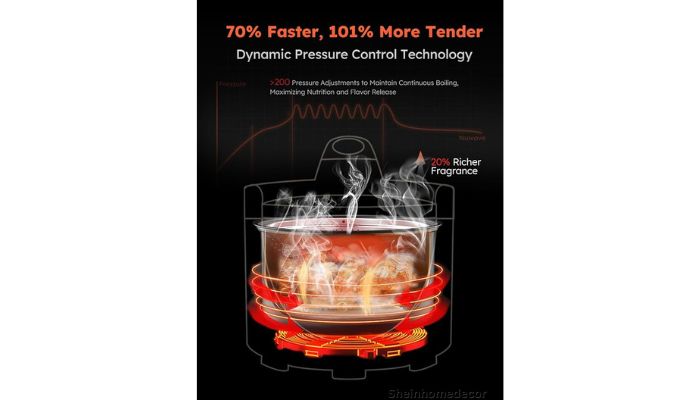
- Precise Temperature Control – Electric heating cycles maintain consistent internal pressure and heat distribution for safe processing.
- Hands-Free Operation – Once you set the time and pressure, the electric cooker regulates the environment with no monitoring needed.
- Consistent Results – Temperature and pressure stay steady, eliminating human error that can affect seal integrity.
- Added Safety Features – Things like lid locks and sensors help prevent many common canning mistakes.
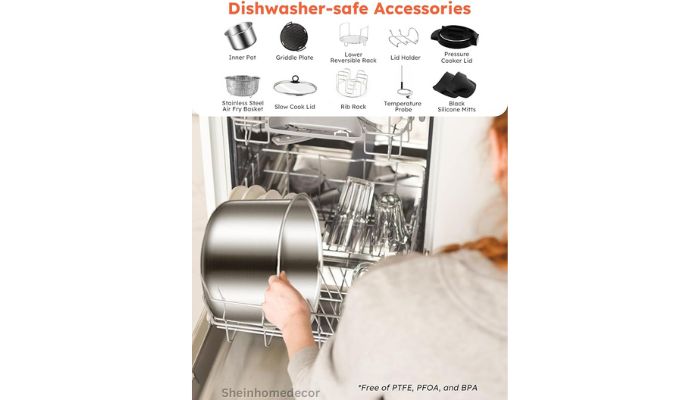
- Space Efficient – Compact electric models take up less room than large stovetop pressure canners.
- Energy Efficient – Electric Pressure Cooker Canning heat up quickly and uses less energy than other canning methods.
- Allows Multitasking – You can work on other tasks while it safely processes jars in the background.
- Quieter Function – Less hissing noise and rattling compared to stovetop pressure canners.
With sophisticated microprocessors controlling time, temperature and pressure, electric models make canning safe, simple and foolproof.
How to Choose an Electric Pressure Cooker Canning
Not all electric multi-cookers are equally suited for canning. If preserving foods will be your primary use, look for these features:
- Canning function specifically designed for home food preservation. This ensures adequate processing temperature and pressure.
- Minimum 6-quart capacity. This provides enough room for canning most jars with space for water to circulate.
- Included jar rack or trivet elevates jars off the bottom.
- Achieves required pressure levels up to 11-12 psi for safe low-acid canning.
- Open vent pipe allows continual stream of steam release. Avoid models with closed vents.
- Option for rapid pressure release when processing completes.
- Audible timer or alarm for hands-free operation.
- Detailed user manuals with canning instructions for pressure, times and altitude adjustments.
Stick with reputable brands designed specifically for home canning. While handy for boiling water bath canning, not all Electric Pressure Cooker Canning have the precise controls needed for safe pressure canning.
Assembling Canning Equipment and Supplies
In addition to the Electric Pressure Cooker Canning itself, you’ll need the following supplies:
- Canning Jars – Select new jars manufactured specifically for home canning like Ball and Kerr. Do not reuse old food jars.
- Lids – Use new flat canning lids with sealing compound. Old lids lose integrity.
- Bands – Metal screw bands secure the lids during processing. Check for damage or rust.
- Jar Lifter – Essential for safely moving hot jars before and after processing.
- Bubble Remover – A plastic wand for releasing trapped air from filled jars before sealing.
- Jar Funnel – A wide-mouth funnel simplifies filling jars without spilling.
- Lid Lifter – Magnets make removing lids easy. Sturdy tongs work too.
- Headspace Tool – A plastic ruler ensures proper headspace when filling jars.
- Towels – Keep kitchen towels on hand for wiping rims and drying jars.
Always inspect jars, rings and lids closely for any defects before use. Wash and rinse canning jars, then keep them hot until filling.
Proper Steps for Filling Jars
How you fill the jars is critical for achieving a reliable vacuum seal when canning. Follow these steps:
- Wash and sanitize jars, lids, rings and any tools. Keep jars in a hot water bath until ready to fill.
- Prepare your food as per recipe. Work in small batches and fill jars promptly.
- Pack hot jars with raw or cooked food, covering with water, juice or syrup as specified.
- Leave the headspace required by the recipe, usually 1/2-1 inch.
- Slide a bubble remover down the inside of jars to release trapped air. Readjust headspace as needed.
- Clean any drips or food off the jar rims with a damp towel.
- Place pretreated flat lids on jars and screw rings on fingertip tight. Do not overtighten.
- Carefully transfer filled jars to the pressure canner, avoiding tilting or spilling.
Now let’s go over proper processing methods in detail, starting with high-acid boiling water bath canning.
Water Bath Steps Using an Electric Pressure Cooker Canning
While any large pot will work, electric cookers allow water bath canning in a built-in vessel. Follow these steps:
- Fill the electric pressure cooker Canning pot with 2-3 inches of water and lower the jar rack in place.
- Carefully load filled jars onto the rack, leaving space between jars for water circulation.
- Lock the lid but do not pressurise or select canning mode. Choose steam or manual setting.
- Bring water to a vigorous rolling boil. Start timing based on your recipe instructions.
- Maintain a steady boil throughout the entire processing time, adjusting temperature as needed.
- When complete, turn off the heat. Let pressure come down naturally for 5 minutes before removing jars.
- Transfer jars to a towel-lined surface to cool undisturbed for 12-24 hours.
- After cooling, check all seals then remove bands, clean and label sealed jars for storage. Refrigerate any unsealed jars.
Always use new lids and follow head space requirements. Limit boiling water bath canning to only high-acid foods like fruits, jams, jellies, pickles and acidified tomatoes. Never attempt to water bath can low-acid vegetables, meats, seafood or combination recipes.
Mastering Low-Acid Electric Pressure Cooker Canning
Pressure canning is required for safely preserving low-acid foods like vegetables, meats, soups, stocks and combo recipes containing them. Follow these steps:
- Add 2-3 inches of water to the Electric Pressure Cooker Canning pot and place filled jars on the rack inside.
- Lock the lid and select the canning or manual setting. For dial gauge models, pressurize to 11 PSI. For weighted models, use 10 or 15 PSI.
- Once pressurized, start timing according to your recipe and altitude. Maintain pressure the entire processing time.
- When complete, turn off the heat and allow pressure to normalize before carefully opening the lid away from you.
- Use a jar lifter to remove jars from the canner. Let jars cool undisturbed on a towel for 12-24 hours for proper sealing.
- Check seals before removing bands, cleaning and labeling your jars. Refrigerate any that haven’t sealed.
Only use scientifically tested canning recipes designed specifically for Electric Pressure Cooker Canning. Never rush or interrupt the pressurization, processing, or depressurization steps when pressure canning.
Step-by-Step Guide to Canning Vegetables

Follow these tips for safely preserving flavorful vegetables:
- Select ripe, fresh vegetables without blemishes, mold or bruises. Rinse and scrub well before peeling, trimming or slicing as needed.
- Prepare vegetables according to your recipe’s directions. Work in small batches to promptly fill jars.
- Blanch or partially pre-cook vegetables prior to packing unless the recipe indicates to pack raw.
- Loosely pack hot jars with raw or cooked vegetables, covering with water, broth or syrup as specified.
- Leave 1 inch headspace for pints and 1.5 inches for quarts. Pack juices to 1/4 inch.
- Release trapped air bubbles with a bubble wand and readjust headspace as needed.
- Wipe jar rims clean before closing with pretreated lids. Process in a pressure canner based on verified timetables.
- After cooling, check seals thoroughly before removing bands, washing and labeling jars.
Follow all processing times precisely for safely enjoying canned green beans, carrots, potatoes, beets and other low-acid vegetables. Adjust pressure canner times if you live at high altitude.
Step-by-Step Guide to Canning Meats
Preserve beef, poultry, pork, fish and wild game in your electric Electric Pressure Cooker Canning:
- Carefully select fresh, high-quality chilled meats free of foul odors, bruising or bone fragments.
- Prepare meats by trimming fat, removing bones and shells, and cutting into pieces as specified.
- Pre-cook meats by sauteing, grilling or simmering until lightly browned. Drain fat. This removes excess moisture.
- While still hot, loosely pack pre-cooked meat pieces into clean pint or quart jars, leaving 1 inch headspace (1.5 inches for fatty meats).
- Add boiling meat broth, water, juice or sauce over the meat, maintaining the headspace below the jar rim.
- Run a bubble remover tool down along the inside of the jars to release trapped air pockets.
- Clean jar rims thoroughly before securing pretreated lids. Process loaded jars immediately after filling.
- Pressure can using verified timetables based on the specific meat, jar size, and your altitude. Do not cut processing times short.
- Allow to depressurize and cool fully before handling jars. Test seals before reusing bands, washing and labeling jars.
Never use boiling water bath canning when preserving meat, poultry, fish or wild game. Botulism bacteria can thrive in low-acid environments.
Step-by-Step Guide to Canning Soup, Stock and Broth

Enjoy homemade flavors all year long by canning your own soup, broth and stock bases:
- Start by preparing the broth, stock or soup foundation following your favorite recipe. Simmer until highly flavored.
- Strain the mixture through a fine mesh sieve or cheesecloth to yield a clear, fat-free liquid.
- For soups, return chopped pre-cooked vegetables, meat, beans or grains to the hot broth as desired.
- Bring the soup, stock or broth base to a rolling boil before carefully filling jars. This prevents floating ingredients.
- Ladle hot liquid into warm jars, leaving 1 inch headspace. Pack thick soups like chowder to 1/2 inch only.
- Run a bubble remover tool along the inside of jars to release trapped air pockets. Top off with more hot liquid as needed.
- Clean rims then apply lids and process immediately after filling. Use electric pressure canner for entire time specified in tested recipes.
- Do not open the canner until fully depressurized after processing completes. Test seals before storing.
Always pressure can soup, stock and broth recipes. Never attempt to water bath can these low-acid mixtures.
Step-by-Step Guide to Canning Fruit
Because most fruits are naturally high in acid, they can be safely processed in a boiling water bath using these tips:
- Select ripe, premium quality fruit without bruises or mold. Rinse and prepare as per recipe.
- Work in small batches. Pack raw fruit or cover with boiling syrup into hot jars, leaving 1/2 inch headspace for soft fruit and 1 inch for firm varieties.
- Release trapped air bubbles with a bubble remover. Top off fruit or syrup to maintain headspace as needed.
- Clean jar rims of drips before securing pretreated lids. Ensure proper fit and seal.
- Process in a water bath canner filled halfway with boiling water. Use a rack and follow verified times.
- When complete, turn off heat and wait 5 minutes before removing jars to a towel-lined surface.
- Allow 12-24 hours for jars to fully cool and seal before removing screw bands. Check seals prior to storage.
- Label sealed jars with contents and date. Store in a cool, dark place up to one year.
Follow lab-tested recipes designed specifically for Electric Pressure Cooker Canning when canning fruit. Never use the boiling water bath method for canning vegetables, meats, seafood or mixed recipes containing them.
Troubleshooting Electric Pressure Cooker Canning Problems
While electric pressure caners make preserving foods easier, occasional sealing issues or other problems can arise:
Jars Fail to Seal:
- Use only new flat lids specifically made for canning. Ensure sealing compound is facing down.
- Carefully follow head space guidelines. Keep rims free of food or drips prior to lidding.
- Maintain steady pressure and venting per recipe directions for complete processing time.
Lost Liquid or Discoloured Food:
- Double check processing time for the specific food type and jar size. Never cut time short.
- Ensure caner has enough water covering jars and check for cracks or defects in glass.
- Leave adequate head space recommended in the recipe.
Floating Food Contents:
- Prevent air pockets by releasing bubbles before lidding and packing food tightly.
- For liquid-cover foods, fill jars slowly and evenly.
Spoilage After Canning:
- Use only lab-tested Electric Pressure Cooker Canning recipes. Do not modify or substitute ingredients.
- Adjust processing time to account for higher altitudes if needed.
- Follow all guidelines precisely, especially for head space, acidity, sealing, and storage.
Conclusion
Electric pressure cookers Canning offer modern convenience and precision for safely preserving foods at home. With programmable technology controlling time, temperature and pressure, they create a hands-off canning experience so you can multitask. By following proper techniques for filling jars, venting, processing time, depressurisation, cooling, and storage, you’ll yield delicious home-canned fruits, vegetables, stocks, soups and meats to enjoy all year long!
Read More: Is Carote Cookware Good